
Mastering Halloween Cookie Stencil Techniques
Halloween is such a magical time to get creative in the kitchen! One of my favorite ways to add a festive touch to cookies is by using cookie stencils. They make decorating so much easier and more fun, especially when you want to impress friends, family, or customers with beautifully detailed designs. If you’ve ever wondered how to master Halloween cookie stencil techniques, you’re in the right place! I’m excited to share tips, tricks, and step-by-step guidance to help you create stunning cookies that capture the spooky spirit perfectly.
Why Cookie Stencil Techniques Are a Game-Changer
Cookie stencils are a fantastic tool for bakers of all skill levels. They allow you to add intricate designs without needing advanced piping skills. Whether you’re decorating for a Halloween party or running a small baking business, stencils save time and deliver consistent results.
Here’s why I love using cookie stencil techniques:
Precision and detail: Stencils help you achieve sharp, clean designs like spider webs, pumpkins, or ghosts.
Speed: You can decorate multiple cookies quickly, which is great when you have a big batch.
Versatility: Use them with royal icing, airbrushing, or edible dust for different effects.
Customization: Mix and match stencil patterns to create unique cookie sets.
If you’re new to stenciling, don’t worry! I’ll walk you through everything you need to know to get started and feel confident.
Essential Cookie Stencil Techniques for Halloween
Let’s dive into some practical techniques that will elevate your Halloween cookie decorating game. I’ll cover the basics and share tips to avoid common pitfalls.
1. Choosing the Right Stencil
Start with a high-quality stencil made from food-safe plastic or acetate. For Halloween, look for designs like bats, witches, skulls, and pumpkins. You can find a great selection of halloween pyo cookie stencils that are perfect for this season.
2. Preparing Your Cookies
Before stenciling, make sure your cookies have a smooth, dry surface. Royal icing works best when it’s completely set—usually after 12-24 hours. This prevents smudging and helps the stencil design stay crisp.
3. Securing the Stencil
Place your stencil gently on the cookie. To keep it from moving, you can:
Hold it steady with one hand.
Use a small piece of tape on the edges (if you’re careful not to damage the cookie).
Use a stencil spray adhesive designed for food use (optional).
4. Applying the Design
There are several ways to apply your stencil design:
Royal Icing: Use a small offset spatula to spread a thin layer of royal icing over the stencil. Lift the stencil carefully to reveal the design.
Airbrushing: Spray edible color over the stencil for a smooth, shaded effect.
Edible Dust or Powder: Use a soft brush to apply edible dust over the stencil for a subtle shimmer.
5. Cleaning and Reusing Stencils
Clean your stencil immediately after use with warm water and mild soap. Dry it thoroughly before storing. This keeps your stencils in great shape for many Halloween seasons to come!

Tips for Perfecting Your Stenciled Cookies
Even with the best tools, practice makes perfect. Here are some tips I’ve learned that make a big difference:
Practice on parchment paper first: Before decorating your cookies, try your stencil technique on parchment paper to get a feel for the pressure and amount of icing or color.
Use thin layers: Applying too much icing or color can cause bleeding under the stencil. Thin, even layers work best.
Work quickly: When using royal icing, work fast before it starts to dry on the stencil.
Experiment with colors: Don’t be afraid to mix traditional Halloween colors like orange, black, purple, and green for eye-catching results.
Combine techniques: Try layering stenciled designs with hand-painted details or edible markers for a unique look.
Creative Halloween Cookie Ideas Using Stencils
Now that you know the basics, let’s talk about some fun ideas to inspire your next batch of cookies!
Spooky Spider Webs
Use a spider web stencil with black royal icing on white or orange cookies. Add a small candy spider for an extra creepy touch.
Jack-o’-Lantern Faces
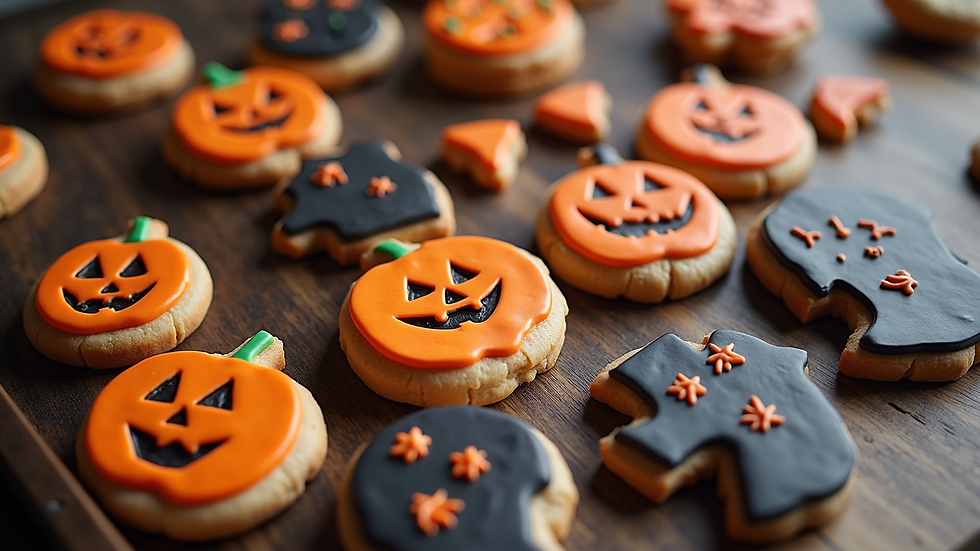
Stencil pumpkin shapes and then add faces with edible markers or piping. This combo is simple but super effective.
Haunted House Silhouettes
Create eerie haunted house scenes with black airbrushed stencils on pale cookies. Add a moon or bats for atmosphere.
Witch Hats and Brooms
Stencil witch hats in purple or black, then add glitter dust for sparkle. Pair with broomstick shapes for a themed set.
Candy Corn Patterns
Use a geometric stencil to mimic candy corn stripes in yellow, orange, and white. These are perfect for a colorful Halloween spread.
Making Your Stenciled Cookies Stand Out
To really wow your friends or customers, consider these extra touches:
Add texture: Use royal icing to pipe borders or dots around your stenciled design.
Use metallic edible paint: Gold or silver accents add a luxurious feel.
Package creatively: Present your cookies in themed boxes or bags with Halloween ribbons.
Offer customization: If you sell cookies, let customers choose stencil designs or colors for a personal touch.
Your Next Steps to Stencil Success
Ready to start stenciling? Here’s a quick checklist to get you going:
Choose your stencil designs and gather supplies.
Bake and cool your cookies completely.
Ice your cookies with a smooth base layer and let dry.
Secure your stencil and apply your chosen technique.
Clean your stencil and admire your work!
Remember, every cookie you decorate is a chance to practice and improve. Don’t be afraid to experiment and have fun with it!
I hope this guide inspires you to master Halloween cookie stencil techniques and create treats that are as delightful to look at as they are to eat. Happy baking and decorating!

Comments